VPN Setup Guide (2026): Install, Secure and Verify Your VPN Correctly
Start here: the safe VPN setup order
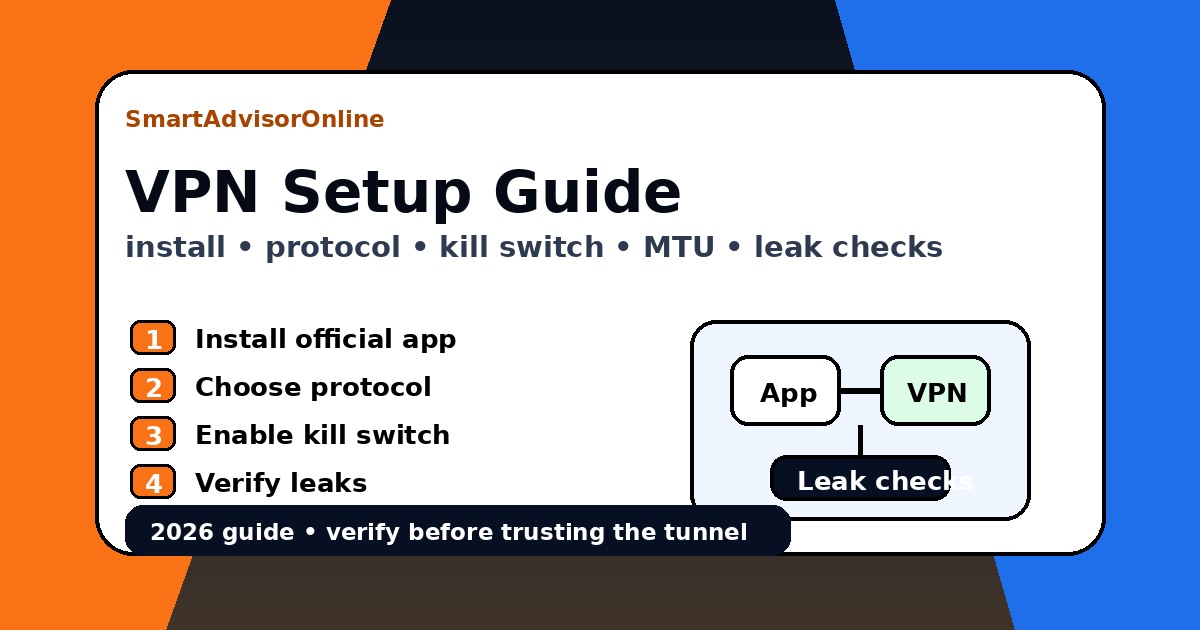
Set up a VPN in this order: install the official app, allow the network adapter, choose a modern protocol, enable kill switch and auto-connect, connect to a nearby server, then verify IP, DNS, IPv6 and WebRTC. Do not trust the “connected” label alone.
For most users in 2026, start with WireGuard or the provider’s WireGuard-based mode. If a hotel, office or public network blocks it, try OpenVPN TCP 443. If pages partly load or video stalls, test MTU around 1400, then 1350.
Quick answer & key takeaway
The safest VPN setup in 2026 is simple: use an established provider, install the official app, enable a real kill switch and auto-connect, pick a modern protocol (WireGuard or OpenVPN), then verify with IP/DNS checks. If sites break or speed collapses, tune MTU (often 1300-1400) and re-test.
Treat VPN setup like an engineering checklist: clean install -> correct driver/adapter -> correct protocol -> verification. A "Connected" badge is not proof. Proof is: IP changed, DNS is inside the tunnel, and the kill switch blocks traffic on disconnect.
If you want the 2-minute foundation first, read how VPN works. For the bigger picture (threat model, logs, and what a VPN can't hide), open VPN security basics.
Pro tip: after setup, run a quick baseline check on our DNS tool Leak Test (baseline vs VPN-on comparison). Then confirm the results again with VPN ON.
Platform selector: pick your device for a fast setup win
Different platforms fail in different ways. Use this selector to get a quick, realistic "one thing to do" tip. It's not marketing - it's the kind of detail that saves time.
Step 1: Clean install (avoid driver conflicts)
The most common VPN setup complaint is not "the VPN is bad." It's "the network stack is messy." If you've tried multiple VPNs before, Windows and even macOS can keep leftover adapters, routes, and firewall rules.
| Action | Why it matters | Practical tip |
|---|---|---|
| Remove old VPN apps | Old clients can keep virtual adapters and services active. | On Windows, check "Apps" + "Network adapters" after uninstall. |
| Reboot after uninstall | Releases locked drivers and resets routes. | Do it before installing the new provider, not after. |
| Update OS | VPN drivers and certificates rely on a patched stack. | Install updates first, then do VPN setup. |
| Use one VPN client at a time | Multiple clients fight for routing + DNS. | Keep only one main VPN installed on a device. |
If you're setting up a VPN specifically for hotel or cafe networks, also read VPN for public Wi-Fi (threat model and realistic expectations).
Step 2: Install & permissions (TAP / Wintun on Windows)
Installing a VPN app is usually a one-click flow. The key detail: VPNs need a virtual network interface to build a tunnel. On Windows this often means a driver prompt.
For dedicated walkthroughs by platform, see: VPN on Windows, VPN on Android, VPN on iOS, and VPN on router.
Step 3: Choose a protocol (protocol decision matrix)
Protocol choice is where "setup" becomes "quality." In 2026, you usually choose between WireGuard and OpenVPN. The best protocol depends on your scenario: speed, stability, and how hostile the network is.
| Protocol | Best for | Why it wins | Trade-offs |
|---|---|---|---|
| WireGuard | Speed, mobile, gaming, everyday use | Modern design, low overhead, fast reconnection (great on 5G/Wi-Fi switching) | Some restrictive networks block UDP more aggressively |
| OpenVPN (UDP) | Balanced stability on desktops | Mature ecosystem, good compatibility | Usually slower than WireGuard; heavier CPU usage |
| OpenVPN (TCP 443) | Hard networks (hotels/offices), strict filtering | Mimics normal HTTPS traffic on port 443; often harder to block | Higher latency; TCP-over-TCP can feel sluggish |
If you want the deeper technical comparison, open types of VPN protocols. For a practical, "what affects speed" view, see Speed Test.
Step 4: Core security settings (do these once)
Good VPN defaults are getting better, but you still need to confirm a few settings. These are the minimum that protects you from the classic "tunnel dropped and my real IP leaked" scenario.
This blocks traffic if the VPN tunnel drops. It's the difference between "private by default" and "private only when everything works."
Let the app connect automatically when you join public networks. You don't want to remember this every time.
Make sure DNS requests are routed via the VPN (or the VPN's DNS). This is the most common "silent leak." If you need the full deep-dive, use DNS leak protection.
If you're unsure whether your kill switch is real, start with VPN kill switch explained.
Step 5: MTU tuning (1300-1400) & speed fixes
Here's the situation that makes people rage-quit VPNs: the app connects, but some sites hang, video buffers forever, or speed feels inconsistent. One underrated cause is packet fragmentation - often fixable with a smaller MTU (Maximum Transmission Unit).
| Symptom | Likely cause | Fast action | Protocol fallback |
|---|---|---|---|
| Some websites never finish loading | Fragmentation + PMTUD issues through the tunnel | Set MTU 1400 -> 1350 -> 1300 (test) | Switch WireGuard ↔ OpenVPN UDP |
| Video buffers every 10-20 seconds | Packet loss + congestion on a server path | Try a closer server / lower MTU | Try OpenVPN TCP 443 on strict networks |
| Speed drops by 50%+ | Server load, peering, CPU overhead | Choose another server region; test with speed tool | Prefer WireGuard for speed |
MTU is not the only speed lever. Server distance and protocol choice matter too. If you want a repeatable approach, use Speed Test and compare results across 2-3 servers and 2 protocols.
Use real tools after setup
A VPN setup is not finished until the result is verified. First check whether the public IP changed. Then check DNS, IPv6 and WebRTC. Then run a baseline speed comparison. If the issue is platform-specific, check live service status and run the streaming diagnostic before changing servers repeatedly.
Step 6: Verify after installation (IP / DNS / Kill Switch)
Verification is where real setup ends. You don't need five different test sites - you need a consistent checklist. Do this once per device, then repeat only if you change protocols, servers, or router configuration.
| Check | How to run it | Good result | If it fails |
|---|---|---|---|
| IP | Connect VPN -> refresh IP page | New IP + correct country/region | Switch server / protocol; confirm split tunneling isn't leaking |
| DNS | Run a DNS test (prefer multiple queries) | No ISP DNS servers visible | Enable DNS leak protection; see DNS leak protection |
| Kill Switch | Disconnect tunnel manually | Traffic blocks immediately | Enable kill switch; validate firewall mode; see kill switch guide |
Want a one-screen baseline? Open Leak Test with VPN OFF and ON and compare. It's not magic - it's just a faster way to confirm the tunnel behaves.
Author's hack (router setups): "When setting up a VPN on a router, use a separate SSID (Wi-Fi name) for the VPN network. That way you can keep your TV on the VPN SSID while your phone stays on normal internet without constant app switching."
Troubleshooting selector (fast fixes)
When VPN "doesn't work," it usually means one of three things: the protocol is blocked, the server path is bad, or DNS/MTU is broken. Use this selector to get a focused fix instead of random toggling.
| Issue | Try first | Then | Deep guide |
|---|---|---|---|
| Sites won't load | Lower MTU (1400 -> 1350 -> 1300) | Switch protocol; confirm DNS-in-tunnel | VPN troubleshooting |
| Slow speed | Change server; prefer WireGuard | Test with speed tool; avoid overloaded regions | Speed Test |
| Disconnects | Enable auto-reconnect; try another protocol | Disable IPv6 (if provider suggests); check Wi-Fi stability | VPN troubleshooting |
| Blocked networks | OpenVPN TCP 443 (HTTPS-like) | Use obfuscation/stealth if available | VPN protocols |
Video walkthrough (official)
If you prefer watching once and then repeating the steps, here's the official SmartAdvisorOnline walkthrough. It uses the same sequence as this guide: install -> protocol choice -> verification.
Fallback link: Watch on YouTube.
PAA: VPN setup questions people ask

Denys Shchur
Founder and editor of SmartAdvisorOnline. Denys focuses on VPNs, network security, and practical privacy workflows. Profiles: LinkedIn • Author page
Disclosure & privacy
We use privacy-friendly analytics only after consent. Some buttons are affiliate links (NordVPN, Surfshark, Proton VPN). If you choose a plan through them, we may earn a commission at no extra cost to you. Read: Disclosure and Privacy.
✓ Leak Test referenced for IP / DNS / IPv6 / WebRTC setup checks
✓ Speed Test referenced for baseline vs VPN speed checks
✓ Streaming VPN Diagnostic and Status Center added for platform-specific issues
✓ Source guidance reviewed for VPN deployment, protocol setup, MTU and remote-access hardening
Verification date: